Below are links to the articles connected with homebrewing in order for simplicity
PART 1: What you need to know to start microbrewing
Below are links to the articles connected with homebrewing in order for simplicity
PART 1: What you need to know to start microbrewing
How to Kit Brew
Ok so now you have your stuff, you know how to clean your stuff and now we are ready to MAKE the stuff..
When making kit brews the first choice you need to make is:
Regular cheaper beer kit which requires adding some form of sugars to? (8-9 pounds to buy + cost of the sugars)
More expensive 1kg beer kit which is ALL MALT and requires no additional sugars? (18 pounds+)
In terms of making them up they are very similar in time taken and identicle almost in method.
Generally the 1kg kits taste better but some kit companies like “Coopers” do some exceptional beers which require additional sugars. Obviously using high quality sugars will make them better (such as beer enhancer or spray malt)
Recommended kits: (Please note i dont get anything out of any of these suppliers for recomending them, im just trying to save your cash)
Woodfordes kits are easy to make and have a generally reliable yeast packet inside. The end result (assuming the yeast works) is excellent. They are generally 18-20 pounds.
Coopers kits are australian kits which require 1kg of additional sugars. They are EXCELLENT kits (If your making a lager type use Glucose, if your making a bitter type then beer enhancer or spray malt…but glucose or even sugar works ok) Average price is 9-10 quid + cost of sugars
Geordie Kits. These kits have a bad reputation but erm…they are fine? Ive made a bunch before (Usually to try something silly like adding ginger too or something) Cheap price for decent beer. Average price is 7 quid + cost of sugars.

Fermenter (with airlock if you have one which can take one)
Long spoon (cheap plastic ladel is fine)
Hydrometer with trial jar
Thermometer
Funnel (Very handy if you have the fermenter with a screw lid which is much narrower than the other fermenter)
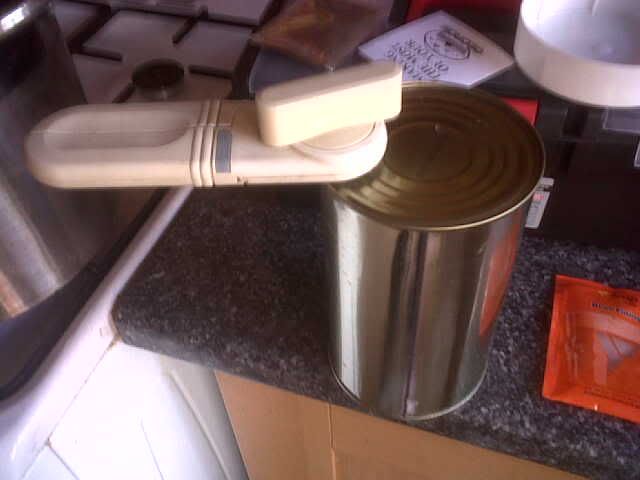
Can opener (nothing worse than getting ready to go and realising you cant open the can)
Kettle (to erm…boil water)
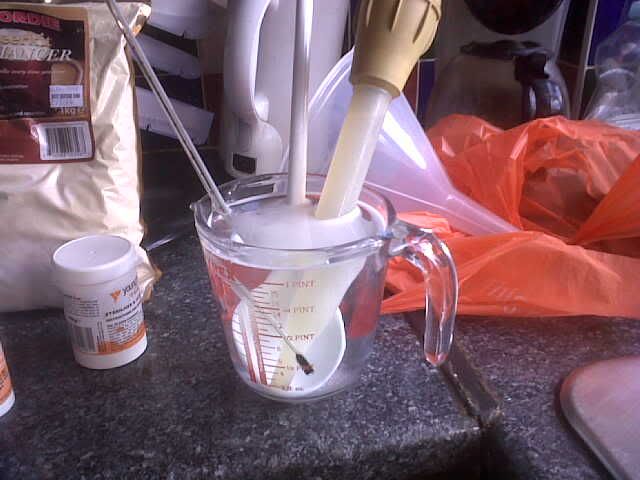
Jug (for getting the yeast going. Pyrex ones are ace)
MAKE SURE EVERYTHING IS CLEANED, STERILISED AND RINSED (If you do this I swear nothing will go wrong)
STEP 1: Preperation
Doing a few simple things now will save time later. When making kits if you follow a few simple rules like cleaning as you go and getting water hot ahead of time it shaves a lot of time off.
a) Preboil a full kettle of water
Since the insides of a can from a beer kit are so insanly THICK AND VISCOUS it pays off in a big way to open the can a fraction with a sterilised can opener, just so there is a small hole for pressure to escape. Once this has been done place in a ban of boiling water and heat very gently. After 5 mins or so the insides will be more easily pourable. You will need to refill and reboil the kettle after this.

Pour some of the boiling water into the jug, about half full for a small jug is fine. This water will be left to cool for the yeast to be prepared in (Ideal is 18-23 degrees C)
b) Make sure you have some place CLEAN (on kitchen roll would be fine) to put items when not in use so they are not left on a potentially dirty surface
STEP 2: Getting the yeast going
Once the water in the jug is down to the right tempreture of 18-23 degrees C (Add a little cold water if it’s too hot) carefully open the yeast sachet and pour into the water with a teaspoon of sugar. Cover this with some kitchen roll and put in a warm place. This will get the yeast going and give it a much higher chance of survival.
STEP 3: Open the can
The contents of the can is basically a very thick malt concentrate. If we didnt heat the can it would not pour well. With some oven gloves or a towel lift the can out the pan and place on the surface.
Open the remainder of the can taking care not to touch the malt inside with your hands.
Pour the entire contents into the fermenter.
Next pour some boiling water into the can and stir with a spoon, the aim is that NO malt be left in the can AT ALL. Every last bit of the syrup you get out will make your beer better. The can will be HOT after this so take care when lifting.
Once nothing remains in the can dispose of this in your recycling bin.
STEP 4: Adding boiling water
The instructions in your beer kit will tell you how much exactly but i just always add another whole kettle of boiling water. Once you have poured this in STIR VIGOUROUSLY or (if you own a fermenter with handles SWIRL the liquid until ALL the malt is dissolved inside)
The more you agitate the mixture the more oxygen is mixed in which helps the yeast divide. MORE MIXING AND OXYGEN = BETTER BEER. Thrashing the beer with a spoon works well if you can avoid it splashing over the edge. Make sure your hands are clean when you do this in case any splashes on you and falls back in.
STEP 5: Adding the sugars
Now mixing whatever sugars in you have at this point is fine. But it’s best to add them premixed in liquid. Bring a pan of water to the boil to sterilise the water and add your sugars to the pan and stir till all is dissolved.

Take care when adding spray malt or beer enhancer as the steam will make the powder clump around the hole in the bag. Stir till no lumps/powder remains and add to the fermenter stirring well. STIRRING VIGOUROUSLY now will give a great start to the beer.
STEP 6: Topping up with cold water
Now we need to top up to 25 litres (I personally aim for 23 litres as this gives the beer a bit more body) with cold water. This will bring the tempreture down to about 18-23 degrees. If its too high then either leave with the lid resting on for a while till it comes down (Dont be tempted to add too much cold water in case you go over 25 litres)
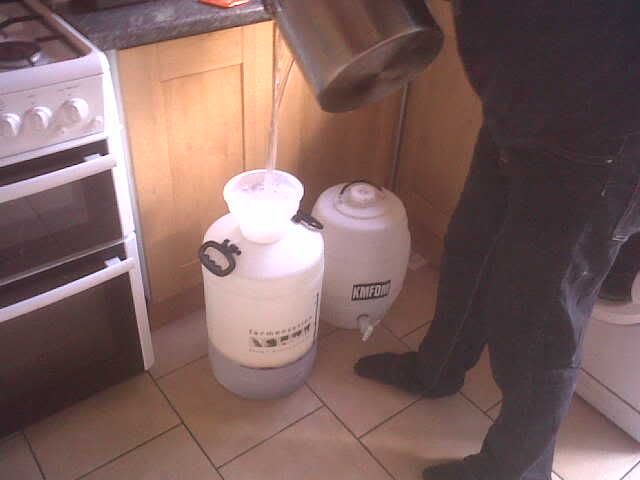
Try to pour the water in front a good height to force lots of oxygen into the mix, the more the water is thrashed about and displaced the better. I find a large stock pot is good for this and you can pour from a great height without splashing.
Once we are at in the 18-23 degree C range continue..
STEP 7: Pitching the yeast
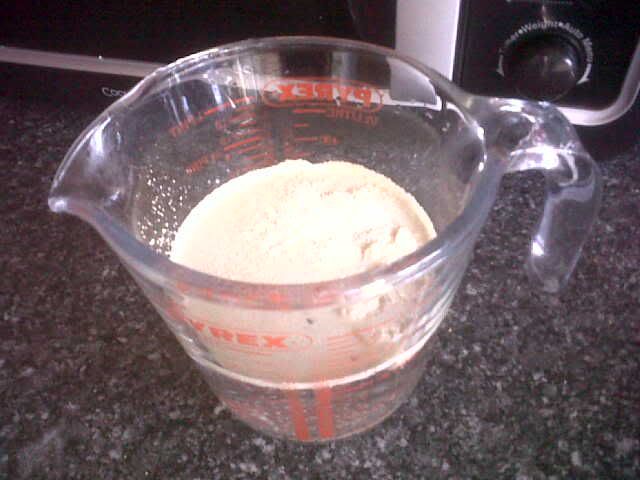
Pitching is just another term for adding. The yeast by now should look like below and be clearly active. Dont worry if it’s not its still probably ok (But it doesnt hurt to keep spare packs on hand and adding more than 1 pack of yeast has no drawbacks)
Stir gently with your spoon
STEP 8: Fit the lid
If you are using a fermenter without an airlock (Such as the fermenter with the lid) its a good idea to open the lid a crack to allow gas to escape and lay a clean towel over the top. Not only does this keep it warmer but also stops any overflowing yeast escaping onto the floor better. It also keeps dirt and such from getting in.
If you are using one with an airlock make sure the lid is on tight and the airlock has some sterilised water in, not too much. Just enough to level out in the u-bend.
STEP 9: Find a warm place to ferment which DOESNT FLUCTUATE often
Although it is important for the beer to be between 18 and 23 degrees hotter than this E.g. upto 26-27 is generally ok.
Any colder and the yeast may become dormant and not fully ferment the sugars. Hotter and the yeast may simply die.
Another important thing to note is tempreture flucations can cause the yeast to extract esters from the ingredients and cause nasty “off” flavours. So a room which doesnt change too often OR covering with a blanket may help keep the tempreture stable.
STEP 10: Measuring the gravity of the brew
After 3 days take your sterilised turkey baster and get some of the brew and 3/4 fill the trial jar. Drop the hydrometer in and look at the reading. Its essential to get “on a level” with the hydrometer to get an accurate reading.
Generally beer is done at about 1.005-1.010 on a hydrometer. But the real rule of thumb which its important to follow especially if your bottling is:
If you take 2 readings the same 2-3 days apart then you know the beer has finished fermenting.
At this point I would recommend leaving 1 more day to clear a bit and reduce the amount of sediment floating about (2 days will not hurt either as long as you havent been opening it often as the Carbon Dioxide layer keeps beer fresh)
STEP 11: Kegging/Bottling
This will have its own section soon but when transferring beer to whatever container/s you have chosen you need to PRIME the beer.
Since must of the sugars have been used up by the yeast there is little left to generate carbon dixoide in the bottle/barrel and keep it fresh. For this reason we add a certain quantity of sugar (cane sugar is best) so this can be consumed by the yeast in the container and create pressure (Eventually it will begin to carbonate the beer so its fizzy if in bottles)
120 grams of cane sugar disolved into some preboiled and then cooled water will suffice.
This can be added to the final mixture and gently stirred. This can then be bottled/kegged.
Brewing despite being centered around encourage a fungus to turn your sugar into alchohol is a remarkably CLEAN affair. So much so that the slightest pieces of dirt or unclean equipement can cause actual bacterial infections of your brew.
The way to prevent this is simple. Clean everything which will be coming into contact with the brew such as:
The idea of brewing is when the yeast is pitched it is fighting some fierce “beach landing” where its trying to become the dominant fungi… i know how it sounds…

So in order to help the yeast multiply quickly we are giving it “ideal conditions” free of opposing bacteria and such. Yeast makes alcohol from sugars in order to kill off other bacterias etc since most bacteria are killed by alchohol (The yeast is sadly unaware of our impending plan to eat it)
Good cleaning practice comes from a couple of products i recommend:
Soda Crystals
These rock, you can get them in wilko for about 75p a massive bag. It’s a coarse powder which mixes with water to form a nice cleaning solution which rinses off easily. THIS IS NOT FOR STERILISING but since bacteria can live in dirt its important to remove ALL VISIBLE dirt. Once you have wiped this all over you can let it stand for a bit then rinse off with no trace.
Steriliser Powder
Youngs sell sterilising powder which is essentially Sodium Metabisulphate which is an anti fungal agent. It stops other nasty stuff growing on your fermenter while the yeast does it’s thing and will kill some of the bacteria already on. Best idea is to soak stuff in this for a bit to get max effect.
Special Brewery Grade Steriliser
Most brew shops and mail order places will do some “Brewery Equivilent” cleaner which is usually a combo of the above 2 and stronger. Very very effective at killing germs, bacteria and cleaning also.
Thin Bleach
This can be used to wash equipment and is quite easy to rinse off, but you MUST rinse a lot as bleach is very toxic. Make sure to NEVER use things like Domestos which are very thick and will cling. MAKE SURE TO GET “THIN” BLEACH (Basically the cheapest one is usually THIN bleach)

Other Stuff you will need:
Non stick scouring pads
Since germs etc can live in scratches try to get sponges which do not scratch. E.g. NOT brillo pads (they also have nasty cleaners in potentially)
Fresh cloths
Just buy cheap cloths and use a different one each time to be safe.
Tips for easy cleaning:
If you can find a large plastic container with a lid (Or a glass jar from IKEA would do if it has a seal on top) you can leave your utensils such as thermoeters, spoons, sponges and anything else just sitting in some of the steriliser liquid, this will keep it clean till you need it. Just rinse before use.
Fermenters, barrels and bottles not in use can be filled with this liquid or at least part filled to keep them clean till use. Cleaning after you brew saves a lot of time trust me. Nothing wose than dried on gack.
NEVER USE THICK BLEACH (Ever..)
Put some of the steriliser mix in a cheap spray bottle to dispense easily in small amounts when you need to.
How to homebrew:
In order to make a 40 pint kit up you will need the following equipment as a minimum:
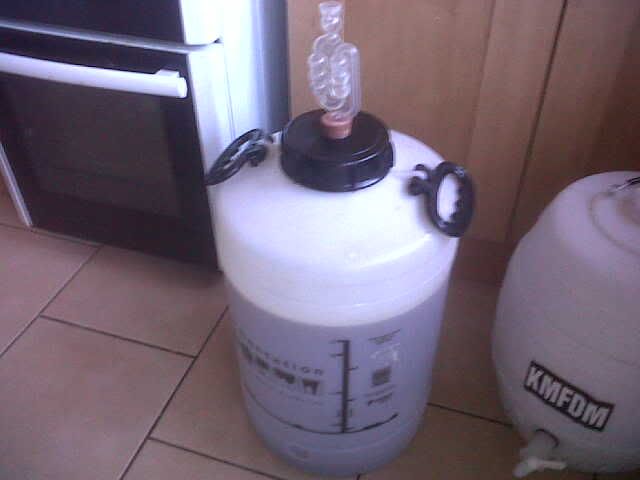
1) Fermentation vessel (Usually come in 30 litre+ sizes) Youngs do great rigid plastic ones with a wide screw lid as below
I love this one despite it being harder to clean the next one is
I just dont like these since its hard to make a hole for an airlock in the lid of this and if the lid gets warped forget getting it on.
2) Hydrometer and testing jar
This weird thermometer looking thing is ESSENTIAL for brewing. It basicly measures the amount of sugars dissolved in a liquid (works by bouyancy) and so you can measure how far along a brew is, when its done and also how much alchohol will be in the beer in the end.
Since you cant afford to waste a whole glass of beer when you want to take a reading you can get this (Buy a turkey baster to get it into the jar)

Plastic Trial Jar (no not that kind of trial jar)
3) Syphon Kit
This is just a piece of pipe to allow you to drain from the fermenter into bottles/barrel. This one has a tap on the end which is pretty handy.

Syphon Kit
4) Thermometer
Since yeast can easily be killed by too hot (and too cold) tempretures a thermometer is essential to make sure when you pitch (or pour in) the yeast that it will be a good envoiroment to get going. More fancy digital ones can be obtained but in my opinion you will only need one of those for All Grain brewing (Brewing from raw ingredients)
4) SPOON
Fear the spoon. Stirrer of ales.
5) Steriliser
Sterilising is the KEY to brewing, dirty equipment = dead yeast = dead beer and rank tastes.
Once you learn the basics of sterilising it’s quick and easy to be clean when brewing. Powdered sterilisier is usually a chlorinated compound or other stuff. Its cheap, toxic and easy to use.
6) An airlock (depending on the fermenter above you are getting)
An airlock works to keep the carbon dioxide layer on the fermenting beer from all escaping too fast so as to protect the beer while its fermenting. It does this by restricting how much escapes, just enough not to blow the top off the fermenter or something. If you get the screw top fermenter as above then this will auto fit into it with the bung. If you got the lid version then its fine to just leave the lid open a crack and put a clean towel over the top.
7) Fermentable Sugars
The theory of having brewing works will be covered later. All you need to know now is that to brew you need sugar in one form or another, these are the options (in ascending order of price)
1) Cane Sugar
Bog standard sugar. This will convert quite easily to alchohol. However the taste is thinist and most “antiseptic” of all options. Very cheap however.
2) Glucose (Or Brewers Sugar)
This is a white powder and converts VERY easily to alchohol and generally gives a much cleaner flavour than cane sugar. I would recommend this at the very least as it is quite cheap also. Good for lagers/ciders.
3) Beer Enhancer
Wilko/Hop and Grape sell this, its basically a mix of glucose and malt. To give BODY (from the malt) and ABV (Malt and Glucose). These are very convinient and cheaper than all malt (Approx 4.99 a bag in Wilko)
4) Spray Malt
Generally come in packs of 500g (you need 1kg for most cheaper kits, remember expensive 1kg kits require NO sugars)
This is the apex of sugars, it adds body, makes a nice head on the beer and stops beer feeling thin. Tastes great. Approx 6.99 for 1kg
In short brewing with regular sugar will give drinkable beer
Glucose will give a cleaner tasting beer but still be a bit “thin”
Beer enhancer is the best option for a novice as it gives great beer at a fair price
Spray Malt is for when you are fairly serious about the beer your making. This can give comparable results to a pub. At a price. A standard kit with this can cost about 16-18 quid to make but can be GREAT.
I’ll write a bit more here since this is quite a crucial decision to make since the outlay for these is quite significant compared to other stuff.
8 ) Bottles and Barrels
Bottles:
Pros:
Allow you to more easily refrigerate your ale (Important if you want pale ale/lager)
Beer gets fizzier quicker (Again important for sparkling ales or lagers/ciders)
Easy to store
When you drink beer from the store then it’s free containers for you
Cons:
Cleaning is labour intensive require cleaning and rinsing of possibly 40 or more bottles!
Filling bottles without a bottling stick can be very messy (But with one is very EASY and quick ) This item fits on the end of the syphon and has a valve which when pressing against the bottom of a bottle will dispence and stop when lifted)
In isolated cases where beer is overprimed (priming is where small amounts of sugars are left to ferment in the bottle to give it fizz) bottles can explode. If you take care when bottling this will never happen.
In short bottles are great if you can be bothered. You can more easily give the beer to people also but cleaning, filling can become a pain.
If you go this route you will need a bottle capper which crimps crown caps onto the top of the bottles. Dont bother with a hammer on one, sometimes technology advances are for the better. You can get these
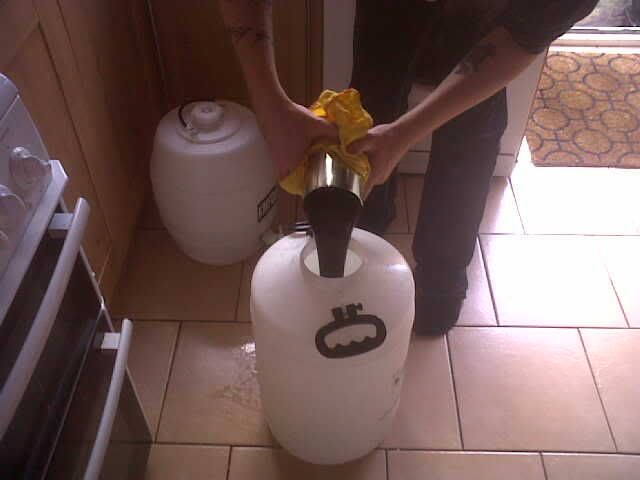
Pressure Barrell
Pros:
Holds 40 pints
Allows you to dispense into glasses easily
Beer matures better with other beer meaning the final product of the barrel will be superior in flavour to bottles
Ace for BBQ’s
Look cool
Cons:
Expensive to buy to begin with
Takes a while to prime (But the idea of homebrewing is to let beer mature for 3-4 weeks. If this is done the barrel will be nice and primed)
HEAVY WHEN FULL *_*
Its a real pain when one gets a leak (Sometimes however its simple like the seal on the lid or something)
For a someone who really likes their beer i would reecommend the pressure barrel. Beer just matures better with other beer around it, with this you will get a more “pub flavour”. 20 quid sounds pricey but i simply cant bear filling, cleaning and storing all those bottles. This is priceless in my opinion.
Outlay:
Ok so your probably thinking how much will all this cost me?? Well most homebrew places will offer a “Starter Kit” which are ACE for getting going (how i started) and they contain most of the above for a fraction of the cost.
Wilko do:
22 quid for that is ace since the fermenter is about 7 quid, theres a hydrometer and trial jar, syphon kit AND a beer kit inside which are 9 quid each) At the moment wilko have certain kits with TWO free inside.
Hop and Grape do a great selection (they deliver too)
Bunch of starter kits from Hop and Grape
The coopers one is INCREDIBLE for people who want to bottle since it comes with a bunch of REUSABLE plastic bottles with screw caps.
The “Quality” one is mainly referring to the fact this comes with an “All malt” kit which basically means the kit is an expensive one and you dont need to add sugar to it. Some of these kits taste close to pub beer.
Personally I would just accept the fact that the outlay for home brewing isnt exactly cheap but by the time your doing your second brew it will already be TONS cheaper than buying beer.
I’ll do some basic calculations for comparison:
KEG ROUTE (Expensive way)
Quality Starter (the hop and grape one) 44 quid
Pressure Barrel 20 quid
Total: 65 quid lets say.
First brew will yield 40 pints of decent quality kit brew for 65 pounds which equals 1.65 a pint approx. Ok thats not great. But lets consider brew 2 (assuming a 20 quid expensive kit)
That will come out at….: 50p a pint. Now THATS CHEAP and every brew from now on will be that much.
KEG ROUTE (Cheap)
Youngs Starter Kit from wilko 22 quid
Pressure Barrel 20 quid
Total for 1st brew: 1 quid per pint approx
Total for 2 brew: 50p a pint
BOTTLE ROUTE Expensive way (With coopers set w screw lids)
Starter from Coopers 80 quid
First brew = 80 divided by 40….. OOOH 2 quid a pint
2nd brew onwards = 50p a pint
BOTTLE ROUTE Cheap way (own bottles collected)
Starter kit from youngs 22 quid
Bottle Capper 9 quid
Bottle caps 1 quid
Total: 31 quid
Total per pint for 1st brew: 77p a pint
Total per pint for 2nd brew 50p a pint
CONCLUSION:
In my opinion brewing is such a USEFUL hobby since you wouldnt be here if you didnt drink a “fair” amount so its safe to assume you will continue such a useful and productive hobby. In short i would get the most expensive solution from the above your funds allow.
I prefer the barrels and have 3. Which allows me to have 1 beer to drink, 2 to mature.
Any questions please leave comments
Well i did my first All Grain (Made from the raw ingredients) of the year and in a long time recently. Some issues (which i will learn from) occured but nothing which should destroy the beer.
Recipe:
4kg Pale Malt
200g Crystal Malt
100g Challenger (I know…i forgot to write my recipe from Beer engine down before i left work) 60 min boil
This will give a very high IBU (International Bittering Units) value but I like a good hoppy beer so lets see how it turns out.
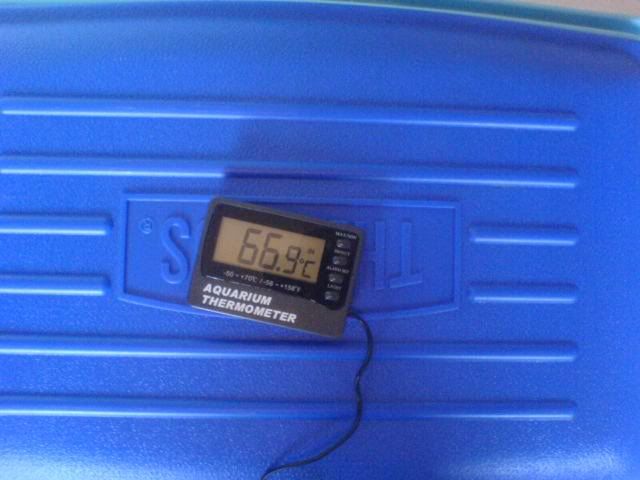
My main issue was the mash. My thermometre is pathetic, some aquarium one i got for a fiver. Sadly which doesnt go over 70 degrees i discovered and also updates once per 10 seconds which is very annoying.
Since I needed to measure 82 degrees accurately this was a bit of a bummer overall :p The water for the mash should be about 67-68 degrees, im assuming a 10 degree loss from the grains.
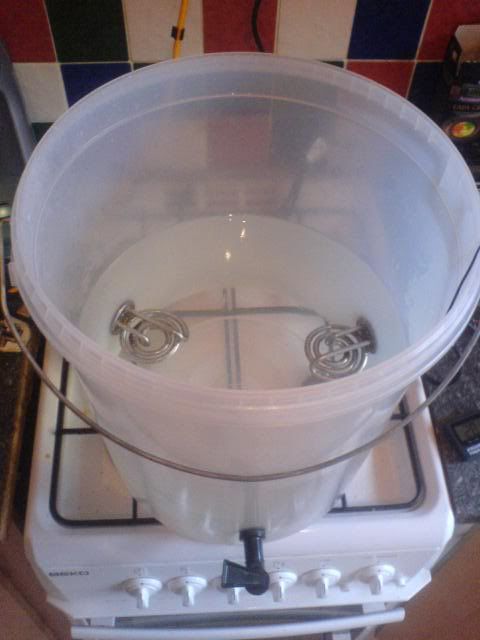
Strike water in my custom made boiler my friend Adam made. Complete with 2 x 1kW kettle elements at the bottom. Sucks up some electricty I can tell you.
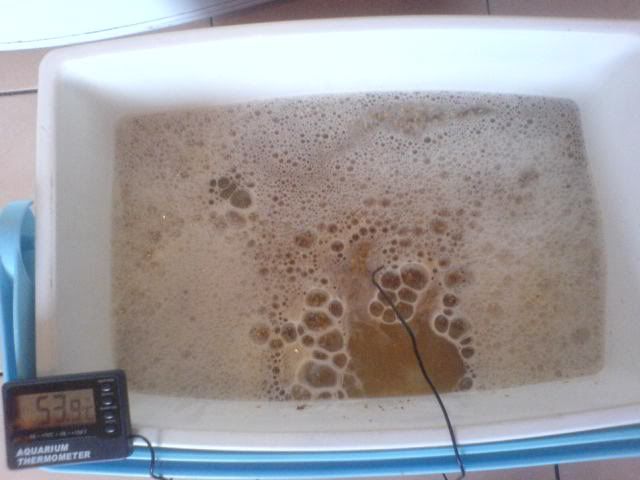
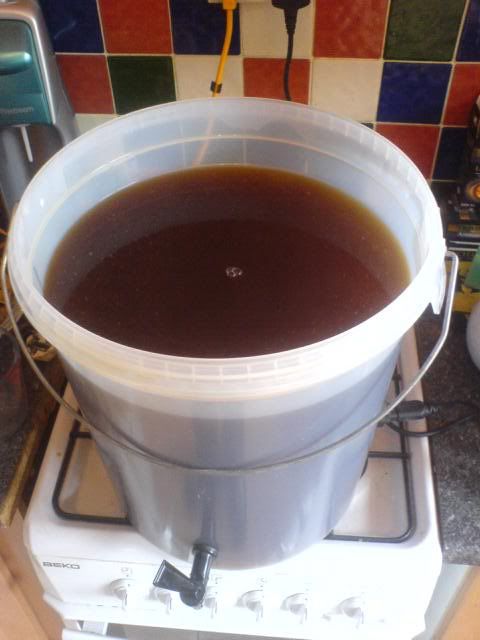
Doughing in the grains….i had forgot to mix hence the reading. Once i had mixed in it was better. This will sit for 1 hour during which time the sugars from the grains will be converted to fermentable sugars.
Thusly, it flucated around 1 degree off. Next time when i have better thermomtre my strike water will be more accurately measured.
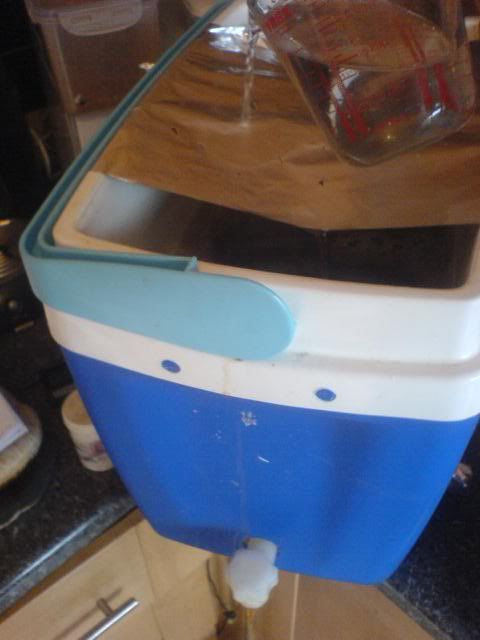
I used the idea of sparging over foil. Sparging is the process which rinses the sugars from the grain in order to get all the fermentable sugars into final product. In this example I am fly sparging which is basically pouring water gently over the grain bed while draining it slowly.
Generally it worked ok but in future ill get MUCH bigger sheets of foil, this is just what i could find in my cupboard at a pinch.
On reflection next time i’ll be batch sparging which is basically add more hot water after the mash and then emptying the first runnings, refilling the run for 10 mins and empty again. Much simpler than the above.
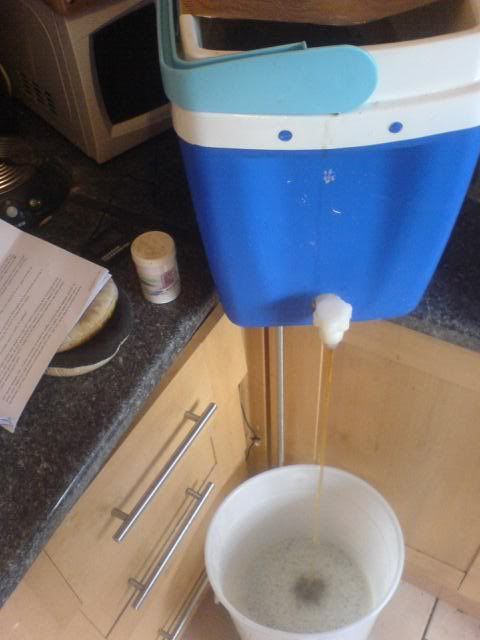
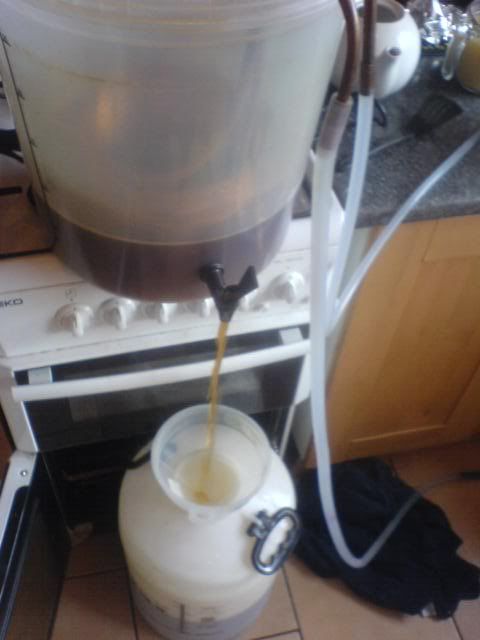
Running into the fermenter ready to be slung in the boiler.
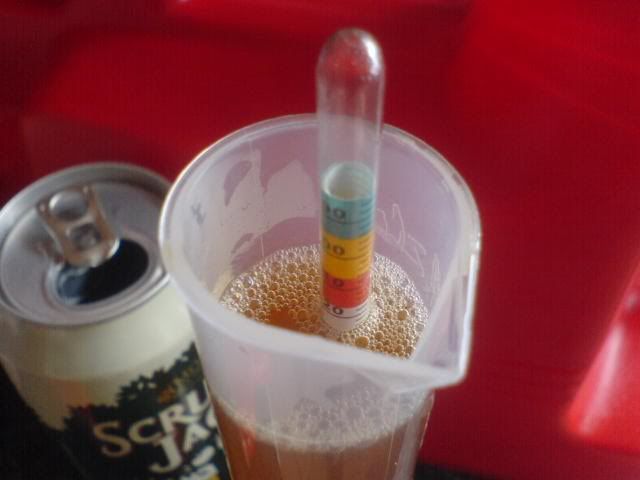
Checking gravity of runnings. The thing in the jar is a hydrometer which basically measures how much sugar is disolved in the wort. The more there is the higher it bobs. As i rinse the sugars out of the grain this will get lower and lower. I know to stop when there is almost no sugar left.
Sparging further would extract nasty tasty enzymes.
Boiling. This takes 1 hour during which time proteins will begin to break out of the mixture and form into horrible looking goo strand which do not look unlike brains. Nice.
The hops are added at the start of the brew and boiled for the full 60 mins. Mostly some hops are placed in at the start and some other hops are added near the end to add aroma to the beer (Goldings/Fuggles are excellent for this)
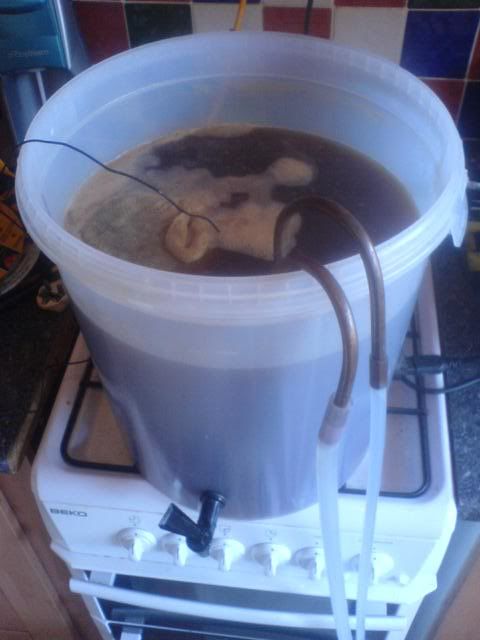
Chilling with an immersion chiller. Thats basically a huge coil of hollow copper which i pass water through by means of a garden hose. This means the stream of water within with cool the wort quickly.
Aerating the wort by pouring it from a height. The reason this is done is to get more oxygen into the mixture which the yeast can use to feed on. Yeast needs to divide quickly or it may succomb to infection. The oxygen and sugars help it to divide quickly.

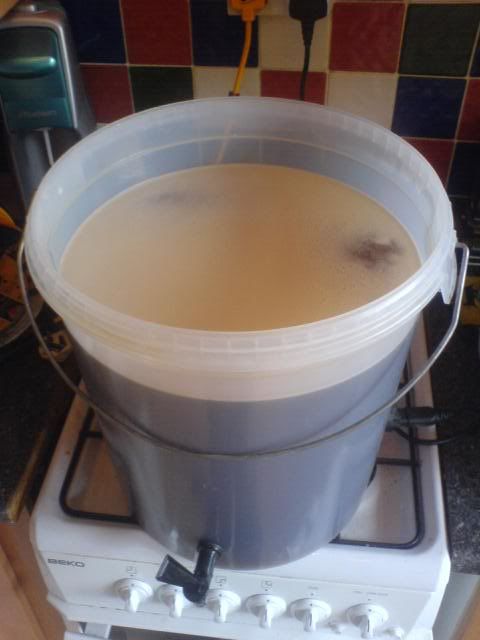
This morning it was BLISTERING away.
Final Gravity was 1.040 (After addition of 200g of white sugar to boost it up a bit)
I tasted a bit of the wort after the boil and it tasted fine to be honest. Its going to be cloudy for sure but to be honest i needed to just jump in feet first to practice and ill be pleased if i get a half decent drinkable ale.
POINT FOR NEXT TIME:
1) Better thermometre – Not being able to tell the strike tempreture or sparging water temp accurately was a real pain and i didnt have a glass thermometre to hand. Really annoying. So i had to just guess which is cringeworthy i know.
2) Better sparging method – Will switch to Batch Sparging. Much easier
UPDATE 21/04/10 – Almost done fermenting just waiting to be bottled.
UPDATE 26/04/10
Berserker bottled! Im very impressed with the clarity, a vast improvement over my last attempt


